Looking for the Best Exercises for an Osteochondral Lesion (Without Surgery)?
If you’ve recently been diagnosed with an osteochondral lesion in your knee, you’re probably wondering how to move forward—without making things worse. These injuries can cause sharp pain, catching, and swelling, especially with walking, stairs, or kneeling. And if you’re managing it conservatively, exercise becomes a balancing act: move enough to stay strong and mobile, but not so much that you overload the damaged cartilage.
This guide walks you through:
- Gentle, PT-approved movements that support cartilage health
- Exercises that improve mobility, stability, and strength
- A clear plan split into Weeks 0–3 and Weeks 3–6
Each exercise is easy to perform at home and based on real clinical programs that I have created to help my patients avoid or delay surgery.
Before we dive in, you may also like:
- Exercises for Meniscus Tear
- Exercises for Knee Osteoarthritis
- Exercises for an ACL Tear Without Surgery
Let’s start with the early phase—focused on mobility, pain control, and protecting the injured area.
Want a quick-reference PDF? Scroll down to the bottom of this post to grab your free printable plan!
Disclaimers and Disclosures: All information in this article is for informational and educational purposes only and should not be taken as individual medical advice. Additionally, this article contains affiliate links, meaning when you make a purchase, we make a small commission at no additional cost to you. For more information, see our full Disclaimers and Disclosures.
Weeks 0–3: Gentle Motion and Quad Activation Exercises for Osteochondral Defect
In this early phase, our main focus is to:
- Control pain, inflammation, and swelling
- Begin gentle range of motion and flexibility of surrounding muscles
- Wake up the quadriceps without stressing the cartilage
Perform these exercises 2 times per day, only if pain stays mild and controlled.
This program was created by a Doctor of Physical Therapy and Orthopedic Clinical Specialist. As always, consult your healthcare provider before starting any new exercise regimen.
1. Calf Stretch with Strap
- Purpose: Stretches the calf muscle without weightbearing on your knee.
- Benefits: Supports full knee extension and the terminal phase of the walking stride.
- How to Do It:
- Sit with your leg outstretched and loop a strap around the ball of your foot.
- Gently pull your toes toward your nose until you feel a stretch in your calf.
- Hold 20 seconds, repeat 5 times.
- Helpful Link: Best Stretching Strap can be found in the link below.
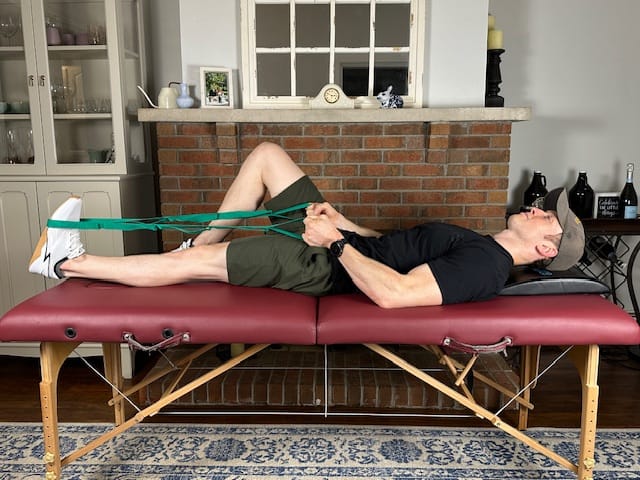
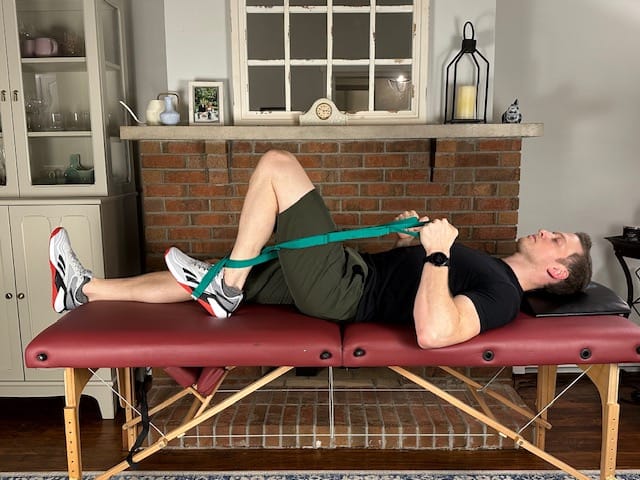
2. Hamstring Stretch with Strap
- Purpose: Stretches the hamstring muscle on the back of the thigh.
- Benefits: Improves sitting and driving comfort and improves extension range of motion.
- How to Do It:
- Lie on your back, loop a strap around your foot.
- Raise your leg up as high as you can, while keeping your knee straight.
- Hold 20 seconds, repeat 5 times.
- Helpful Link: Best Stretching Strap can be found in the link below.
3. Quad Set
- Purpose: Activates the quads without bending or stressing the knee.
- Benefits: Maintains strength while protecting cartilage.
- How to Do It:
- Sit with your leg straight and press the knee gently down toward the table.
- Tighten the muscle on the front of your thigh.
- Hold of 2 seconds, repeat 30 times.
- Helpful Link: Best Thick Yoga Mat to lie on for comfort can be found in the link below.
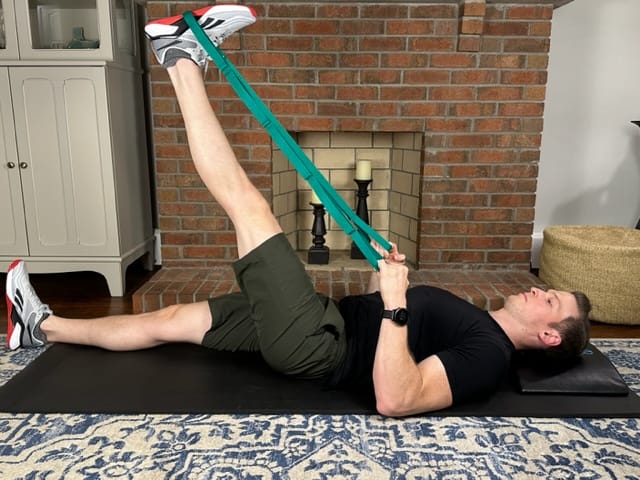
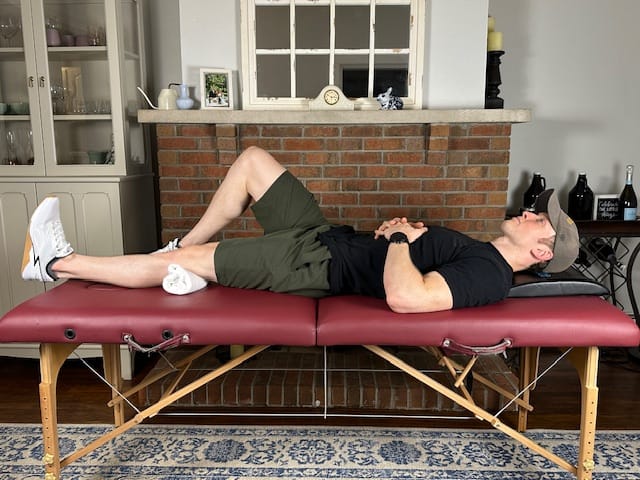
4. Straight Leg Raise

- Purpose: Strengthens the thigh without moving the knee joint.
- Benefits: Builds control for future walking and stair climbing.
- How to Do It:
- Lie on your back with one leg bent and the other straight.
- Tighten your thigh and lift the straight leg to the height of your bent knee, then lower slowly.
- Repeat 10 times, complete 2 sets.
- Helpful Link: Best Thick Yoga Mat for comfort can be found in the link below.
5. Short Arc Quad
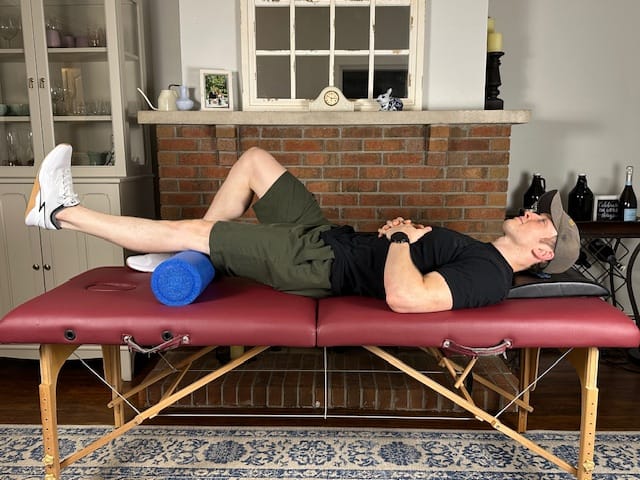
- Purpose: Strengthens quads through a small and safe range of motion.
- Benefits: Supports strengthening without placing excessive stress on the knee.
- How to Do It:
- Rest your knee over a foam roll while lying on your back.
- Straighten the knee by lifting your heel off the surface, pause briefly at the top.
- Repeat 15 times, complete 2 sets. Add an ankle weight for an added challenge.
- Helpful Link: Best Ankle Weights and Foam Roll can be found in the links below.
6. Long Arc Quad
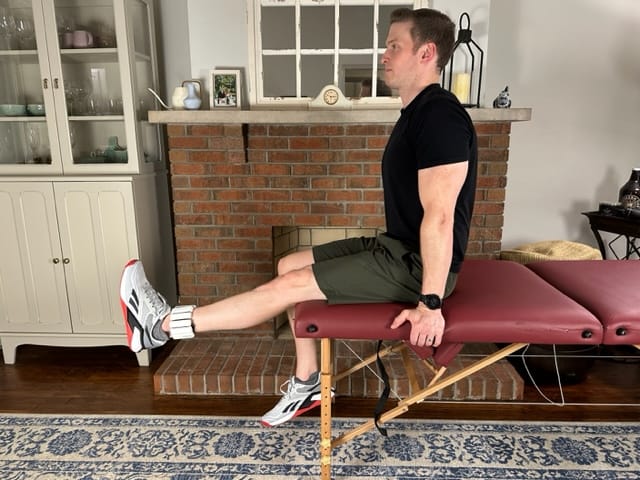
- Purpose: Strengthens the quads through a fuller range of motion.
- Benefits: Prepares the muscle for standing and walking activities.
- How to Do It:
- Sit upright with your thigh supported.
- Slowly extend your leg fully, hold briefly, then lower.
- Repeat 15 times, complete 2 sets. Add an ankle weight as strength improves.
- Helpful Link: Best Ankle Weights can be found in the link below.
7. Heel Slides
- Purpose: Restore bending and knee flexion range of motion.
- Benefits: Prevents stiffness and supports joint fluid flow.
- How to Do It:
- Loop a strap around your foot.
- Slide your heel slowly toward your buttocks, keeping your foot on the surface.
- Hold 10 seconds, repeat 10 times.
- Helpful Link: Best Stretching Strap can be found in the link below.
Bonus: Ice Pack and TENS for Osteochondral Lesion Pain and Swelling
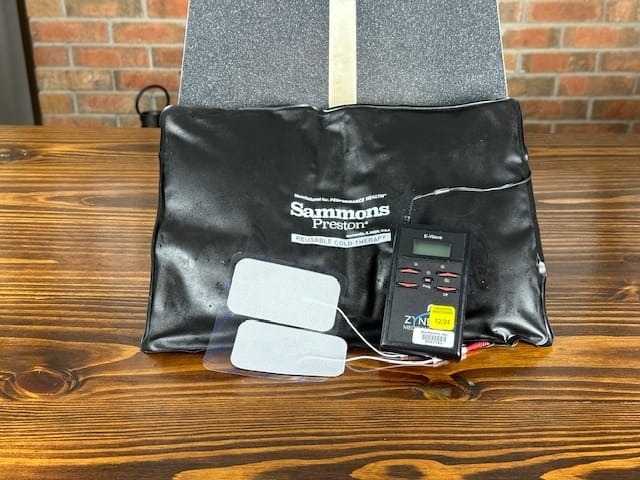
- Purpose: Reduce pain, inflammation, and muscle inhibition during early recovery.
- Benefits: Enhances comfort and reduces swelling, especially after exercise.
- How to Use:
- Place TENS pads just over either side of the knee.
- Apply ice in a pillowcase for 10–15 minutes post-exercise.
- Pro Tip: Best TENS Unit and Ice Pack can be found in the links below.
Weeks 3-6: Strength and Weightbearing Exercises for an Osteochondral Defect
Now that tissue healing is underway, it’s time to focus on:
- Begin controlled, light weightbearing activities
- Restoring strength and movement control
- Building tolerance to daily activities
Perform these exercises 4 times per week, and do your exercises from phase 1 3 times per week.
This program was created by a Doctor of Physical Therapy and Orthopedic Clinical Specialist. As always, consult your healthcare provider before starting any new exercise regimen.
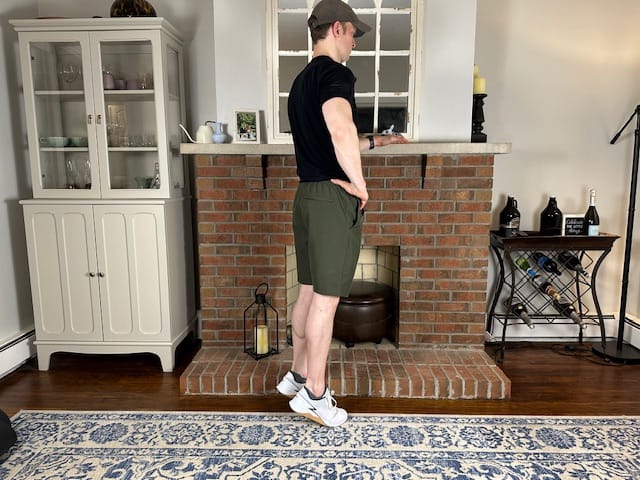
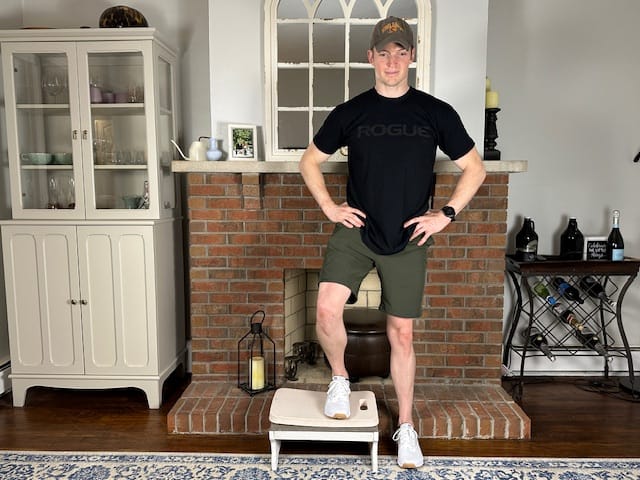
1. Calf Stretch on Slant Board

- Purpose: Stretches the calf while improving weightbearing tolerance
- Benefits: Supports walking, stairs, and knee extension
- How to Do It:
- Stand with both feet on a slant board or incline surface.
- Lean forward to feel a strong stretch in the calf.
- Hold 20 seconds, repeat 5 times.
- Helpful Link: Best Slant Board can be found in the link below.
2. Heel and Toe Raises
- Purpose: Build strength in the calves and anterior shin muscles.
- Benefits: Improves walking control, balance, and foot clearance.
- How to Do It:
- Stand near a counter or wall for support.
- Slowly rise onto your toes (heel raise), then rock back and lift your toes off the ground (toe raise)
- Repeat 15 times, complete 2 sets.
3. Cone Step Over
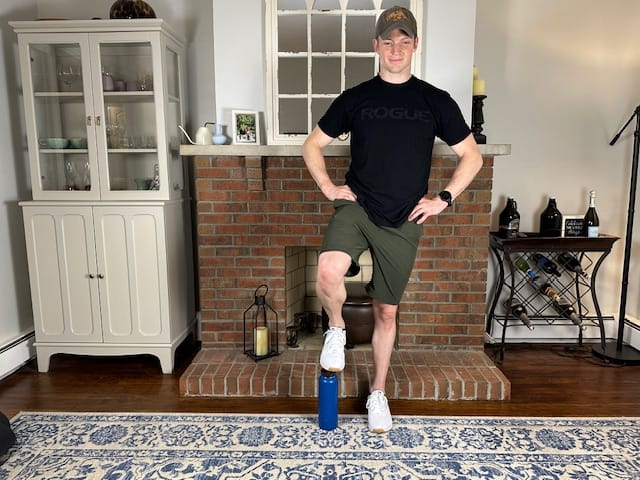
- Purpose: Improves active knee flexion and coordination of movements.
- Benefits: Prepares for walking, stairs, and uneven terrain.
- How to Do It:
- Stand on one side of a small cone and hold on to your counter for balance.
- Step sideways over the cone with both feet, then back to the start position.
- Repeat 10 times, complete 2 sets.
- Helpful Link: Best Stackable Cones can be found in the link below.
4. Forward Step-Ups
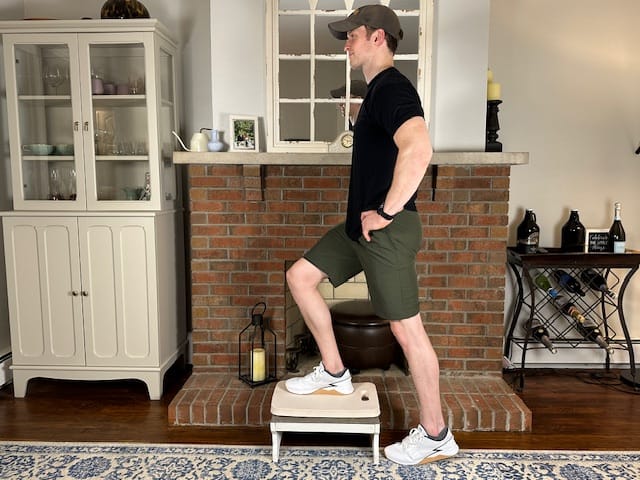
- Purpose: Improve single-leg strength and control.
- Benefits: Builds strength for stairs and daily activities.
- How to Do It:
- Stand in front of a step with a counter nearby for balance.
- Step up with your injured leg, then lower with control.
- Repeat on the other side, perform 10 reps, complete 2 sets.
- Helpful Link: Best Adjustable Stepper can be found in the link below.
5. Lateral Step-Ups
- Purpose: Enhances coordination and eccentric quadriceps control.
- Benefits: Improves stability and prepares for lateral movement in sport and life.
- How to Do It:
- Stand beside the step and step laterally up with your outer leg.
- Bring the other leg up, then step down to the other side.
- Return to start in the same fashion, complete 10 reps and perform 2 sets.
- Helpful Link: Best Adjustable Stepper can be found in the link below.
6. Sidesteps with Band
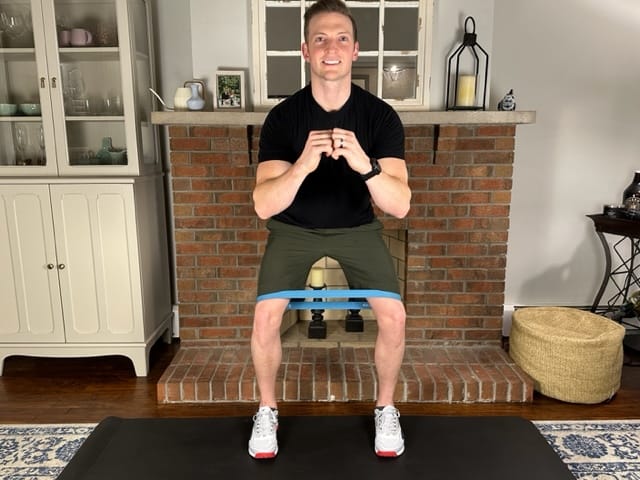
- Purpose: Activate glutes and lateral stabilizers.
- Benefits: Improves knee alignment and reduces dynamic valgus.
- How to Do It:
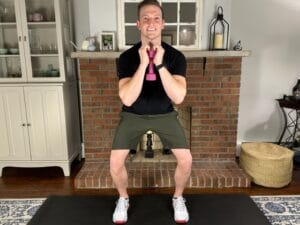
- Place a resistance band just above your knees and lower into a mini squat.
- Step sideways slowly, keeping tension in the band.
- Perform 12-15 steps in each direction, rest, and repeat 3 times.
- Helpful Link: Best loop Resistance Bands can be found in the link below.
Looking for a simple way to stay consistent?
👉 Download the free full Osteochondral Lesion Exercise Program + Exercise Tracker (PDF) to follow and log your daily progress.
Osteochondral Lesion vs. Osteochondritis Dissecans: What’s the Difference?
If you’ve been diagnosed with an osteochondral lesion, you might also come across the term osteochondritis dissecans (OCD). While the two conditions affect the same region—the cartilage and underlying bone of a joint—they’re not quite the same.
- Osteochondral lesions are broad injuries to the cartilage and subchondral bone, often caused by trauma, degeneration, or surgery.
- Osteochondritis dissecans is a more specific condition where a fragment of cartilage and bone begins to separate from the surrounding joint surface, often seen in adolescents and young adults.
Both conditions can cause pain, swelling, and joint locking, but their treatment plans may differ slightly depending on severity, age, and activity level.
We’ll be covering exercises specifically for osteochondritis dissecans in detail in an upcoming article.
Best Exercises for Osteochondral Lesion: Final Thoughts
An osteochondral lesion can significantly impact your ability to walk, squat, and perform everyday activities—but with the right approach, healing is absolutely possible. A structured rehab plan with consistent exercise is key to promoting cartilage healing, improving joint stability, and regaining confidence in your movement.
This PT-designed program walks you through safe, progressive exercises you can do at home to reduce pain, restore range of motion, and strengthen the muscles that support your knee joint. Whether your lesion was caused by injury, surgery, or wear and tear, these exercises are tailored to support the cartilage and surrounding tissue as you heal.
Stay consistent, avoid high-impact or deep bending too early, and always monitor your symptoms. With time and effort, you’ll build strength, improve joint mechanics, and move closer to returning to pain-free activity.
Why Trust Physical Therapy Simplified for Osteochondral Lesion Rehab Exercises?
At Physical Therapy Simplified, our mission is to provide an accessible, trustworthy source of physical therapy guidance that anyone can understand, follow, and benefit from. We want you to feel confident that you’re getting evidence-based advice and the best exercises for an osteochondral lesion of the knee—all designed to reduce pain and restore your highest functional potential.
This article was written by Andrew Harkins, PT, DPT, OCS, a licensed physical therapist with over twelve years of clinical experience. He is certified by the American Board of Physical Therapy Specialties as an Orthopedic Clinical Specialist and has successfully guided hundreds of patients through the rehab process for cartilage injuries, ligament repairs, and joint preservation.
Andrew has also served as a teaching assistant at the University of Pittsburgh’s Doctor of Physical Therapy Program, where he contributed to musculoskeletal rehab education with an emphasis on evidence-based care for lower extremity conditions. His knowledge and hands-on experience ensure that the information you’re reading is not only accurate but clinically proven to help.