Updated on February 12, 2026
Looking for the Best Exercises to Avoid Surgery after sustaining an ACL tear?
If you’ve been diagnosed with an ACL tear but are hoping to avoid surgery, you’re not alone. Many people—especially those with partial tears or lower activity demands—can successfully manage their injury with physical therapy, focused rehab, and the right at-home exercises.
Research shows that conservative treatment for ACL tears can restore function, reduce pain, and support return to activity—without going under the knife. Whether you’re newly injured or months into recovery, working with your body (not against it) is key.
As a Doctor of Physical Therapy, I’ve helped dozens of patients rehab ACL injuries without surgery. This guide walks you through a PT-approved, phased exercise plan designed to be done at home. You’ll learn how to:
- Gently restore range of motion in the early weeks
- Rebuild strength and control in the middle phase
- Prepare for a safe return to your favorite activities—without instability
Whether your injury is recent or chronic, this exercise routine can help you feel more confident in your knee—and more in control of your recovery.
Before we dive in, you might also find these related guides helpful: exercises before ACL reconstruction, exercises for meniscus tear, and exercises for knee OA—a common long-term effect of ACL injuries.
Now, let’s walk through each recovery phase—starting with what to do in the first 0–2 weeks to reduce swelling, protect the joint, and begin gentle movement.
Want a quick-reference PDF? Scroll down to the bottom of this post to grab your free printable plan!
Disclaimers and Disclosures: All information in this article is for informational and educational purposes only and should not be taken as individual medical advice. Additionally, this article contains affiliate links, meaning when you make a purchase, we make a small commission at no additional cost to you. For more information, see our full Disclaimers and Disclosures.
Phase 1 (0–2 Weeks): Early ACL Tear Rehab at Home
In the first two weeks after an ACL tear, your top priorities are to reduce swelling, restore knee range of motion, and gently activate the quadriceps. Early movement helps prevent joint stiffness and muscle shutdown while promoting circulation and healing.
This phase includes a mix of gentle stretching and light strengthening exercises, all designed to be safe and effective for home use. This routine should be completed twice per day, stopping or modifying any exercise that increases your pain or symptoms.
This program was created by a Doctor of Physical Therapy and Orthopedic Clinical Specialist. As always, be sure to consult your healthcare provider before starting any new exercise regimen.
1. Calf Stretch with Strap
- Purpose: Stretches the gastrocnemius muscle, which crosses the knee and can limit extension when tight.
- Benefits: Promotes full knee extension and eases stiffness.
- How to Do It:
- Sit with your leg straight and loop a strap around the ball of your foot.
- Gently pull your toes toward you until you feel a stretch in the calf.
- Hold for 20 seconds, repeat 5 times.
- Pro Tip: A stiff Stretching Strap helps you to keep effective tension.
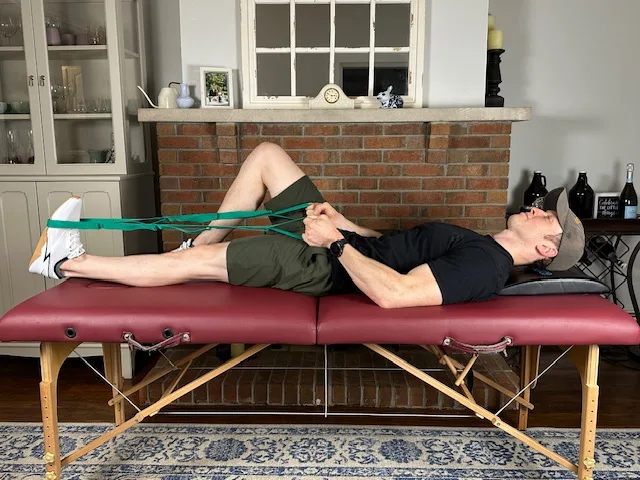
2. Hamstring Stretch with Strap
- Purpose: Targets tight hamstrings, which can restrict knee extension.
- Benefits: Improves flexibility and reduces tension at the back of the knee.
- How to Do It:
- Lie on your back, loop a strap around your foot, and keep your leg straight.
- Lift your leg until you feel a stretch in the back of your thigh.
- Hold for 20 seconds, repeat 5 times.
- Pro Tip: Use a Stretching Strap with loops for better control and positioning.
3. Heel Prop
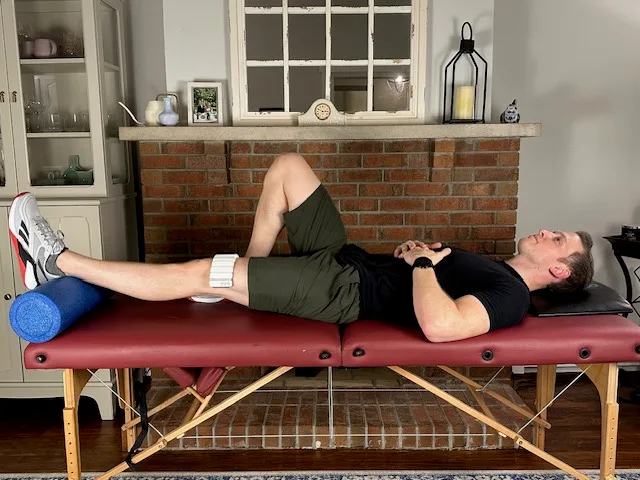
- Purpose: Passively improves knee extension (straightening) after ACL injury.
- Benefits: Reduces stiffness and supports normal walking mechanics.
- How to Do It:
- Prop your heel on a towel roll or foam roller.
- Place an ankle weight on your knee and allow the knee to relax and straighten.
- Hold for 5 minutes, build up to 10 minutes if restriction still exists.
- Pro Tip: Increase the Ankle Weight gradually to progress your stretch and extension gains.
4. Heel Slides

- Purpose: Restores knee flexion in a safe, controlled motion.
- Benefits: Prevents stiffness and encourages joint lubrication after an ACL injury.
- How to Do It:
- Loop a strap around your foot.
- Slide your heel slowly toward your buttocks, keeping your foot on the surface.
- Hold for 10 seconds and repeat 10 times.
- Pro Tip: Use a Stretching Strap with loops for ease and for the best results.
5. Quad Set
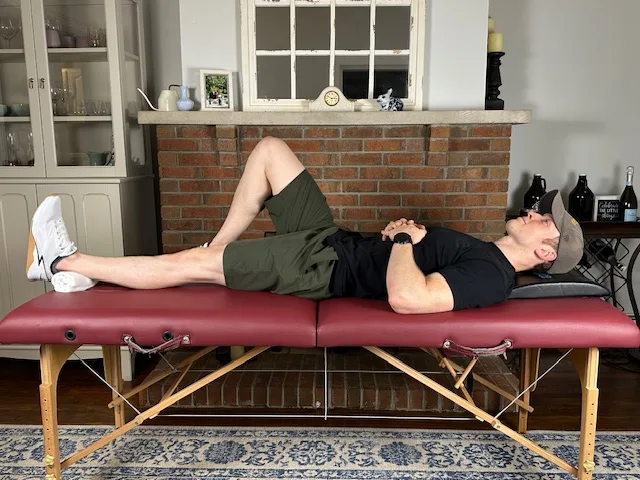
- Purpose: Reactivates the quadriceps, especially the vastus medialis.
- Benefits: Prevents muscle atrophy and helps with knee stability following ACL injury.
- How to Do It:
- Lie on your back with a towel roll under your ankle.
- Tighten your thigh to press the knee down.
- Hold for 2 seconds, perform 30 reps.
- Pro Tip: Use a Thick Yoga Mat for more comfort and support.
6. Straight Leg Raise
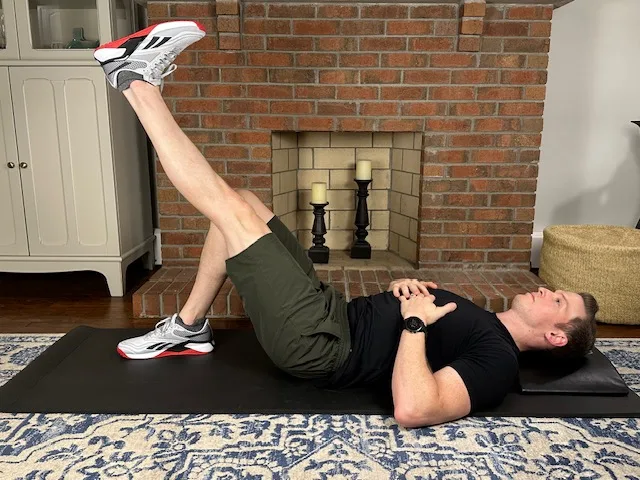
- Purpose: Builds quad strength without moving the knee joint.
- Benefits: Supports knee stability and improves muscle control following an ACL injury.
- How to Do It:
- Lie on your back with one leg bent and the other straight.
- Tighten your thigh and lift the straight leg to the height of your bent knee, then lower slowly.
- Repeat for 10 reps and complete 2 sets..
- Pro Tip: A Thick Yoga Mat helps reduce pressure on your hips and spine during floor exercises.
7. Short Arc Quad
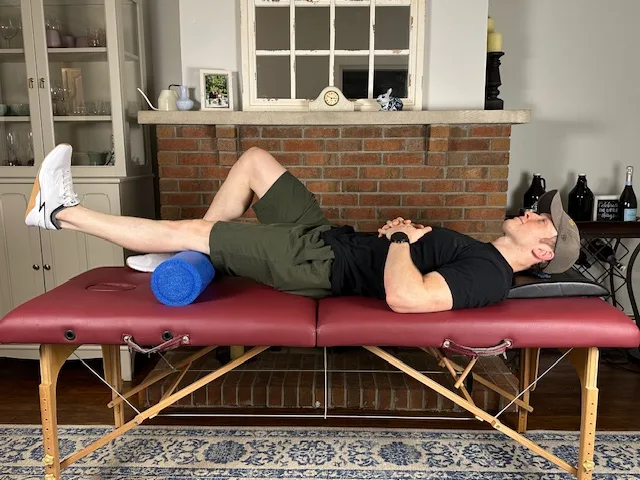
- Purpose: Isolates quad activation through a small range of motion.
- Benefits: Reinforces quad control while limiting joint and ligament stress.
- How to Do It:
- Rest your knee over a foam roll while lying on your back.
- Straighten the knee by lifting your heel off the surface, pause briefly at the top.
- Lower slowly and repeat 20 times for 2 sets.
- Pro Tip: Use Ankle Weights for added resistance and a Foam Roll for proper support.
8. Long Arc Quad
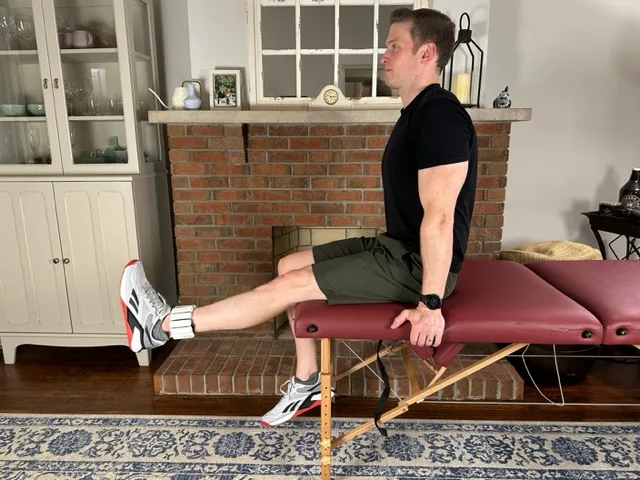
- Purpose: Strengthens the quadriceps through a fuller, more functional range.
- Benefits: Prepares the knee for standing and walking.
- How to Do It:
- Sit upright with your thigh supported.
- Slowly extend your leg fully, hold briefly, then lower.
- Perform 20 reps, complete 2 sets.
- Pro Tip: Use Ankle Weights to increase resistance and muscular activation.
Bonus: Ice Pack and TENS for ACL Injury Pain and Swelling
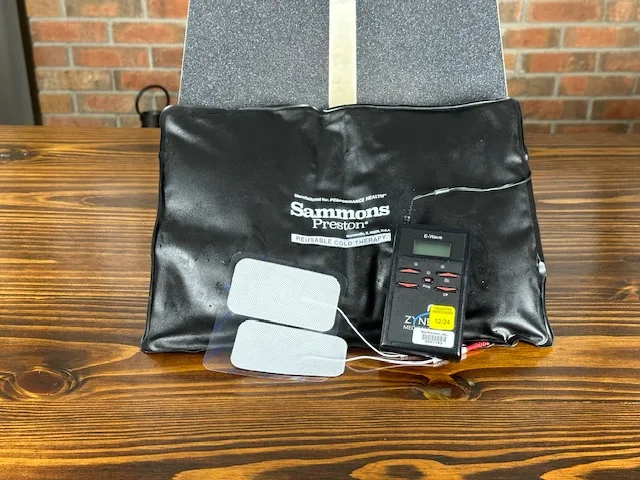
- Purpose: Reduce pain, inflammation, and muscle inhibition during early recovery.
- Benefits: Enhances comfort and reduces swelling, especially after exercise.
- How to Use:
- Place TENS pads just over the painful area of the knee.
- Apply ice for 10–15 minutes post-exercise.
- Pro Tip: TENS can help “wake up” a dormant quad—use it before or during exercises for added effect.
Phase 2 (2–4 Weeks): Building Strength & Stability After ACL Tear
As pain and swelling begin to decrease, the focus of ACL tear rehab shifts toward restoring functional strength, especially in the quadriceps, and improving balance and movement control. These are the building blocks for everyday activities like walking, climbing stairs, and getting up from a chair.
During this phase, you’ll continue working on flexibility, but now you’ll add more active, weight-bearing movements to reintroduce your knee to safe, controlled loading. You’ll also begin simple balance exercises to start retraining joint awareness (proprioception).
This program was created by a Doctor of Physical Therapy and Orthopedic Clinical Specialist. As always, be sure to consult your healthcare provider before starting any new exercise regimen.
1. Calf Stretch on Slant Board

- Purpose: Targets the gastrocnemius muscle more deeply than strap-based stretching.
- Benefits: Improves knee extension and supports walking mechanics.
- How to Do It:
- Stand on a slant board with heels down and toes up.
- Lean forward until a stretch is felt in your calves.
- Hold for 20 seconds, repeat 5 times.
- Pro Tip: Using a Slant Board is the most effective way to perform this stretch.
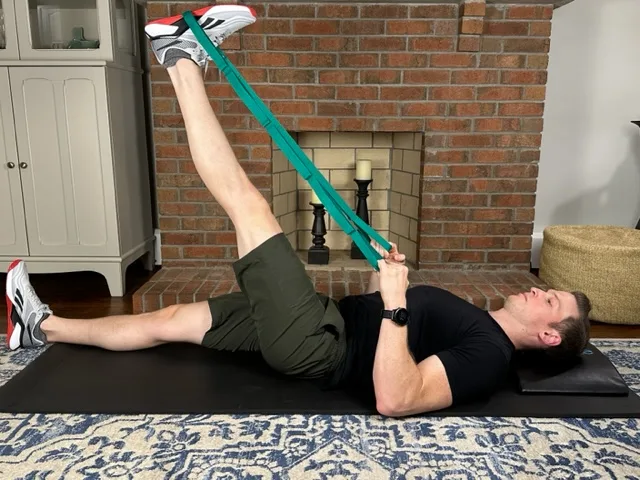
2. Prone Quad Stretch with Strap
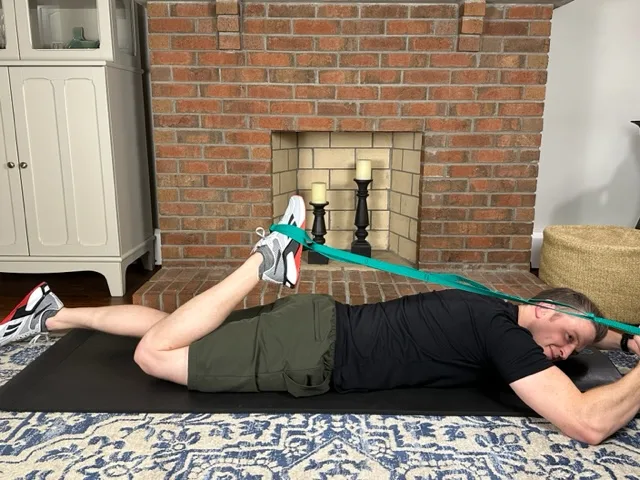
- Purpose: Stretches the quadriceps while also focusing on improving knee flexion.
- Benefits: Improves knee bending and reduces anterior thigh tightness.
- How to Do It:
- Lie on your stomach and loop a strap around your ankle.
- Gently pull until you feel a stretch in the front of your thigh.
- Hold for 10 seconds, repeat 10 times.
- Pro Tip: Use a Stretching Strap with loops to create a lasso for an effective stretch.
3. Heel Raises & Toe Raises
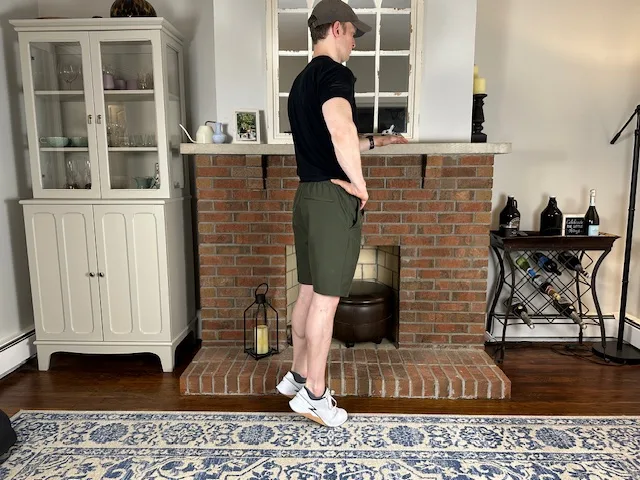
- Purpose: Strengthens calves and improves ankle rocker for proper gait.
- Benefits: Restores ankle motion and supports knee during walking.
- How to Do It:
- Stand tall and slowly rise onto your toes, then rock back onto your heels.
- Move with control, not momentum.
- Perform 15 reps, repeat for 2 sets.
- Pro Tip: Wear supportive Minimalist Shoes for ease while doing your standing exercises.
4. Cone Step-Overs

- Purpose: Encourages active knee bending and step control.
- Benefits: Improves coordination and confidence in gait mechanics.
- How to Do It:
- Set up a cone if front of your counter or other stable surface.
- Start on one side and step laterally over the cone, and then back to your start position.
- Over and back counts as one rep, complete 30 reps.
- Pro Tip: Use Stackable Cones to increase the height and make it a greater challenge.
5. Step-Ups (Forward)
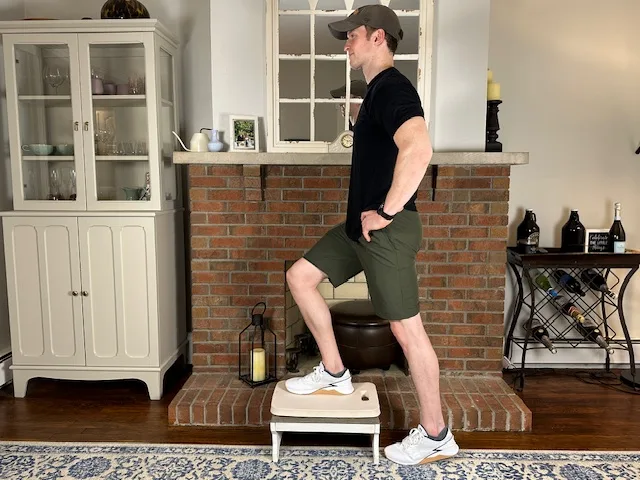
- Purpose: Builds quad strength through a functional motion.
- Benefits: Prepares for stairs, walking, and standing movements.
- How to Do It:
- Stand in front of a step with a counter nearby for balance.
- Step up with your injured leg, then lower with control.
- Repeat on the other side, perform 10 reps, complete 2 sets.
- Pro Tip: Use an Adjustable Stepper and start at 4 inches and slowly increase the height as the movement gets easier.
6. Lateral Step-Overs

- Purpose: Trains lateral hip and knee strength in a controlled environment.
- Benefits: Improves stability and prepares for turning and pivoting motions.
- How to Do It:
- Stand beside the step and step laterally up with your outer leg.
- Bring the other leg up, then step down to the other side.
- Return to start in the same fashion, complete 10 reps and perform 2 sets.
- Pro Tip: Focus on knee alignment as you go over the Adjustable Step, don’t let it collapse inward.
7. Single Leg Stance
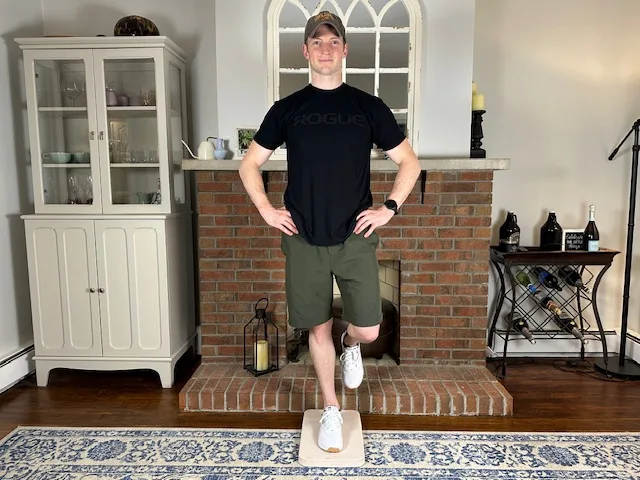
- Purpose: Retrains balance and joint awareness through static control.
- Benefits: Improves proprioception and knee stability.
- How to Do It:
- Stand on your injured leg in front of a counter for support.
- Lift your hands off the counter and balance for 15 seconds.
- Repeat on the other side and complete 5 sets.
- Pro Tip: If you can balance without problem, stand on a Balance Pad to increase the challenge.
Phase 3 (4–8 Weeks): Strength, Control & Return to Functional Movement After ACL Tear
By the 4–8 week mark after an ACL tear, pain and swelling should be well-controlled, and you’re likely feeling more confident with daily movement. Now, it’s time to progress to higher-level strengthening, focusing on hip and quad development, dynamic balance, and unilateral control—all key elements in preventing re-injury and regaining full function.
In this phase, you’ll continue using bodyweight and resistance tools like dumbbells and bands to challenge your strength and movement mechanics. Exercises become more functional, mimicking the demands of walking, stairs, and light sport-specific tasks.
All of these movements can be performed at home if you have access to light equipment and a stable support surface (like your kitchen counter). Stick to pain-free reps, and prioritize form and control over intensity.
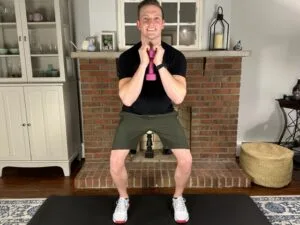
1. Goblet Squats

- Purpose: Builds compound strength in quads, glutes, and core in a functional movement pattern.
- Benefits: Improves squat mechanics, knee control, and lower body power.
- How to Do It:
- Hold a dumbbell close to your chest with elbows down.
- Squat down slowly, keeping your chest tall and knees aligned.
- Press through your heels to return to standing 10 times, complete 3 sets.
- Pro Tip: Slowly increase the Dumbbell Weight over time to build more strength.
2. Single Leg RDL (Romanian Deadlift)

- Purpose: Strengthens the hamstrings, glutes, and core while challenging dynamic balance.
- Benefits: Reinforces hip stability and knee control during single-leg stance.
- How to Do It:
- Stand on your injured leg and hold a light weight in the opposite hand.
- Hinge at the hips, extending the free leg back as the weight lowers.
- Return to upright by squeezing your glutes and hamstrings. Complete 3 sets of 10 reps.
- Pro Tip: When the movement gets easy, add a Dumbbell Weight for a greater challenge.
3. Step Downs
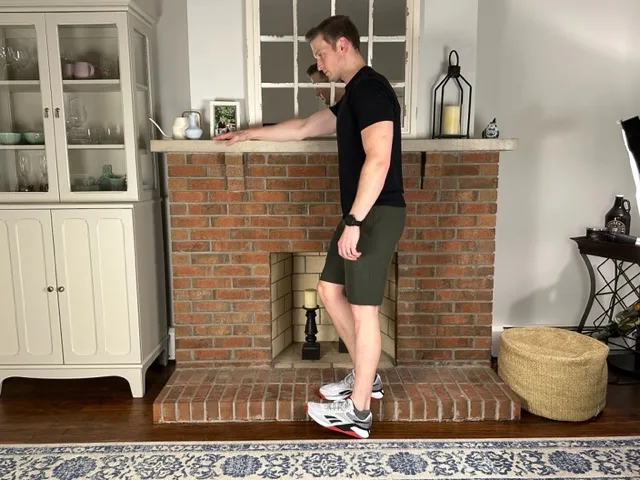
- Purpose: Trains eccentric quad control through a functional movement.
- Benefits: Improves knee stability and control during descent-based tasks (stairs, hills).
- How to Do It:
- Stand on a step near your counter for light support.
- Slowly lower your opposite heel toward the ground without collapsing at the knee.
- Push through your stance leg to return to the top. Complete 2 sets of 10 reps.
- Pro Tip: Start on the lowest setting of an Adjustable Stepper and slowly increase the height as it gets easy.
4. Sidesteps with Band
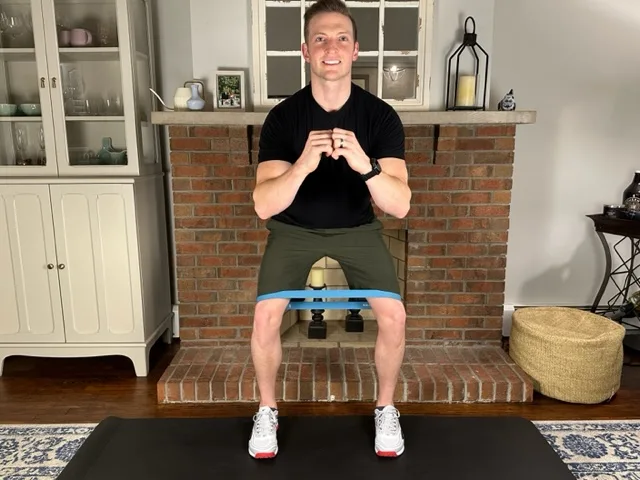
- Purpose: Activates glute medius and lateral hip muscles that stabilize the knee.
- Benefits: Reduces dynamic valgus and improves lateral movement control.
- How to Do It:
- Place a resistance band just above your knees and lower into a mini squat.
- Step sideways slowly, keeping tension in the band.
- Perform 12-15 steps in each direction, rest, and repeat 3 times.
- Pro Tip: Keep your feet pointing straight ahead and your knees pressed into the Resistance Band—no dragging steps.
Looking for a simple way to stay consistent?
👉 Download the free full ACL Tear Recovery Program + Exercise Tracker (PDF) to follow all 3 phases and log your daily progress.
Frequently Asked Questions About ACL Tear Exercises
Yes — some ACL tears, especially partial tears or tears in people with lower activity demands, can be managed without surgery through physical therapy and a structured home‑based rehab plan. Progressive strengthening and stability exercises can help improve knee function and reduce symptoms without an operation.
Recovery timelines vary based on tear severity, activity goals, and adherence to rehab. With dedicated rehabilitation, many people see meaningful improvements with daily activities in 3-6 weeks. Often, higher demand work-related activities are significantly better between 2-4 months and sport level activities can take 6-9 months. Typically, partial tears improve sooner and more complete tears take longer.
Non‑surgical rehab may be a good option if your knee remains relatively stable during everyday activities, you have a partial tear, or your lifestyle doesn’t involve high‑impact or pivoting sports. A clinician can assess knee stability and guide you on whether conservative management is appropriate.
Without surgery, some people experience residual instability — especially during cutting, pivoting, or high demand activities. Strengthening the muscles around the knee (quads, hamstrings, hips) and proprioception training can improve stability, but full ligamentous stability may not always return on its own. Unfortunately, you don’t always know how your knee will respond until you begin to attempt some modified versions of these activities.
Many individuals who don’t undergo surgery can return to low‑impact activities like walking, hiking, or cycling with good strength and stability. However, returning to high‑pivoting sports (soccer, basketball, skiing) without surgery may increase the risk of re‑injury or knee instability unless your knee demonstrates excellent control and strength.
A functional knee brace can offer extra support and help protect the joint during early rehab or when performing functional tasks. Some clinicians use bracing as a temporary tool alongside strength and movement training to improve confidence and reduce instability.
Best Exercises for ACL Tear Recovery: Final Thoughts
Dealing with an ACL tear can be both frustrating and confusing—especially if you’re trying to avoid surgery or delay it. But having a structured plan makes all the difference. As a physical therapist, I’ve seen how targeted rehab can help people reduce pain, restore confidence, and regain function—often without ever needing an operation.
That’s why I created this exercise progression. It’s the same at-home ACL tear recovery program I use with patients in the clinic to help them safely rebuild strength, restore mobility, and protect their knee from further injury.
The key is to stay consistent and listen to your body. Do these exercises daily or as tolerated, avoid anything that causes pain, and progress at your own pace. Within a few weeks, you may notice better knee mobility, improved muscle control, and greater confidence with everyday activities—all without setting foot in a surgical suite.
If you do end up getting surgery, be sure to see what exercises we recommend starting the first week after your ACL surgery.
Why Trust Physical Therapy Simplified for ACL Tear Recovery Exercises?
At Physical Therapy Simplified, our mission is to provide an accessible, trustworthy source of physical therapy guidance that anyone can understand, follow, and benefit from. We want you to feel confident that you’re getting evidence-based advice and the best exercises after an ACL tear—all designed to reduce pain and restore your highest functional potential.
This article was written by Andrew Harkins, PT, DPT, OCS, a licensed physical therapist with over twelve years of clinical experience. He is certified by the American Board of Physical Therapy Specialties as an Orthopedic Clinical Specialist and has successfully helped hundreds of patients recover from ACL injuries—both with and without surgery.
Andrew has also served as a teaching assistant at the University of Pittsburgh’s Doctor of Physical Therapy Program, where he contributed to musculoskeletal coursework with a special focus on knee rehabilitation and surgical treatment recovery strategies. His knowledge and hands-on experience ensure that the information you’re reading is not only accurate but clinically proven to help.