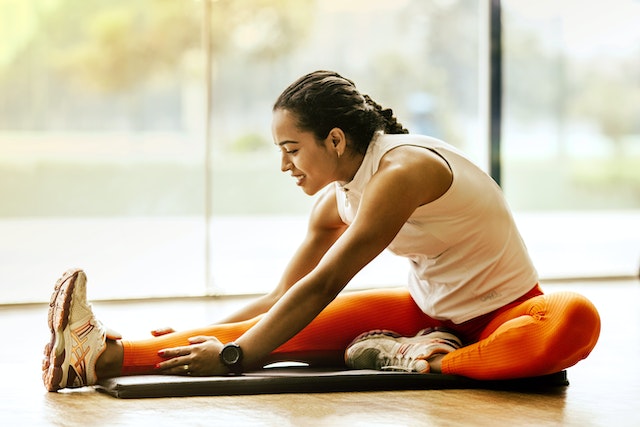
Full range of motion of the knee joint
In the image above, her right knee is demonstrating full extension range of motion and is completely straight on the ground. Her left knee is demonstrating full range of motion and is bend all the way to her butt.
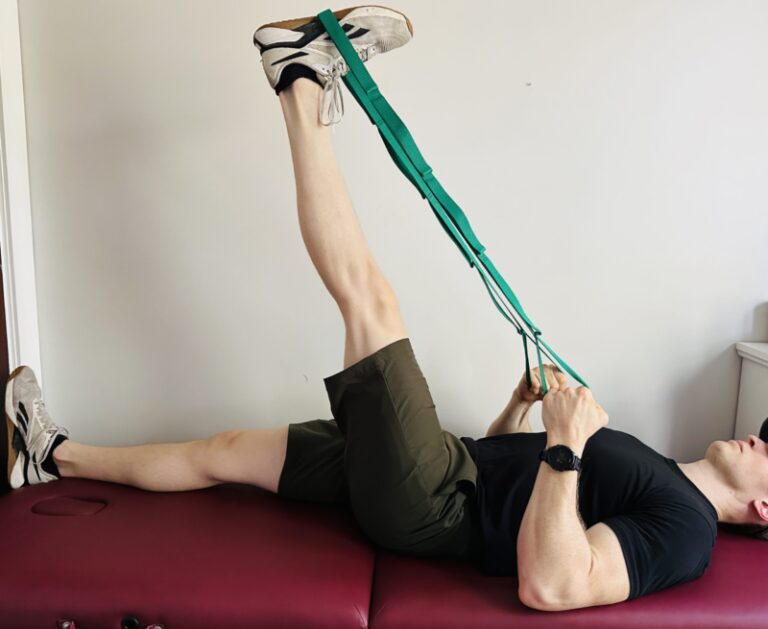
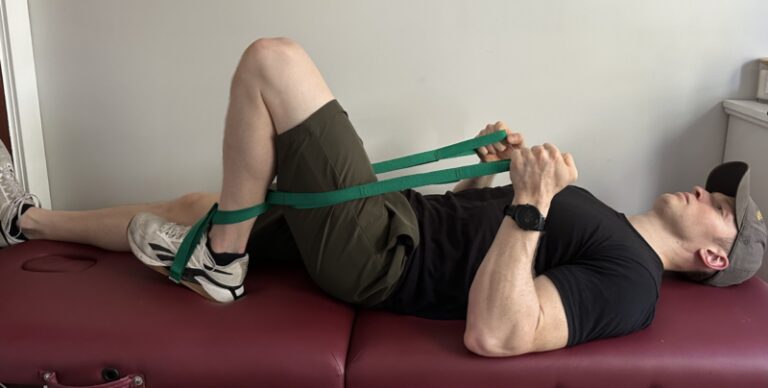
#1 Hamstring Stretch
Start by lying on your back. Place the strap around the middle of your foot and then pull on the strap with both arms to lift your leg straight off of the table until you feel a stretch down the back of your leg.
Hold this stretch for 20 seconds and perform 5 times
The best strap for this exercise can be found in the link below.
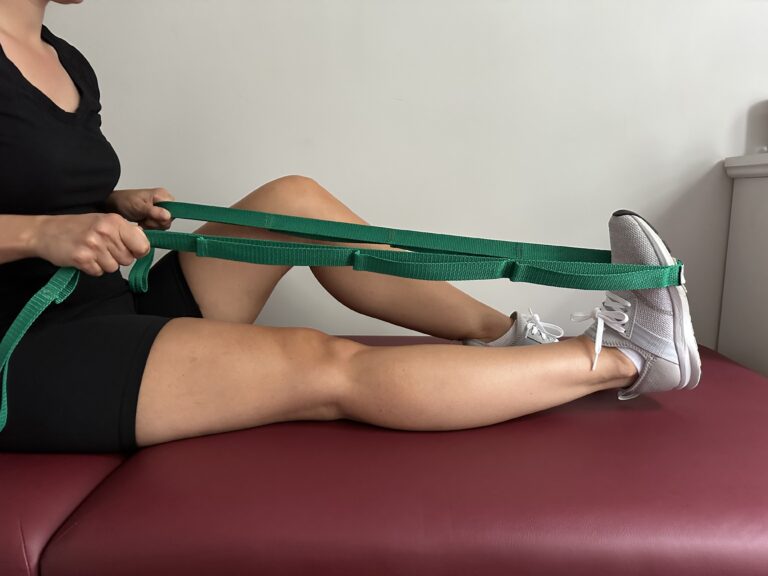
#2 Calf Stretch
Start by lying on your back. Place the strap around the ball of your foot and then pull on the strap with both arms, pulling your toes toward your nose. Keep your leg flat on the floor. You should feel a stretch down the back of your calf.
Hold this stretch for 20 seconds and perform 5 times
The best strap for this exercise can be found in the link below.
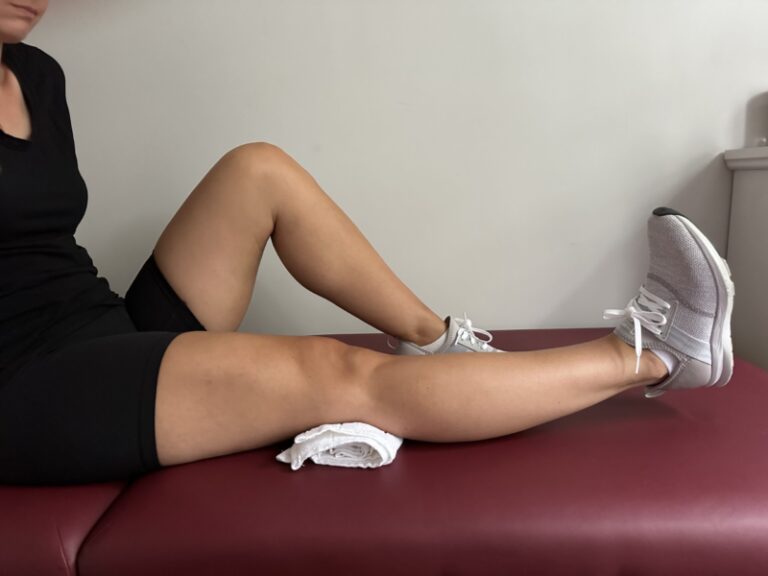
#3 Quad Set
Start by lying on your back and place a small towel roll behind your knee. Actively tighten the muscle on the front of your thigh by pushing the back of your knee into the towel roll, trying to flatten it out. You should feel your quad muscle tighten.
Tighten for 3 seconds and perform 20 times
Just roll up a towel or use a very small cushion/pillow to provide some support and cushioning behind the knee.
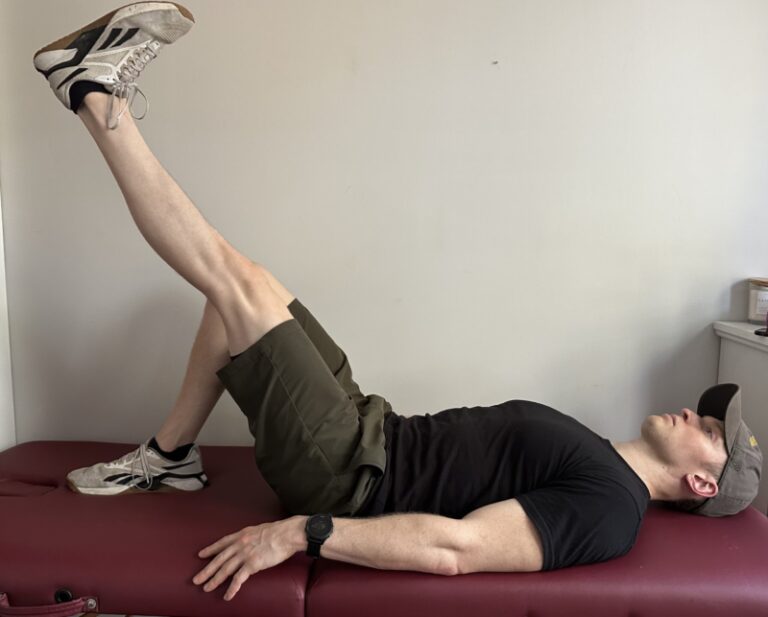
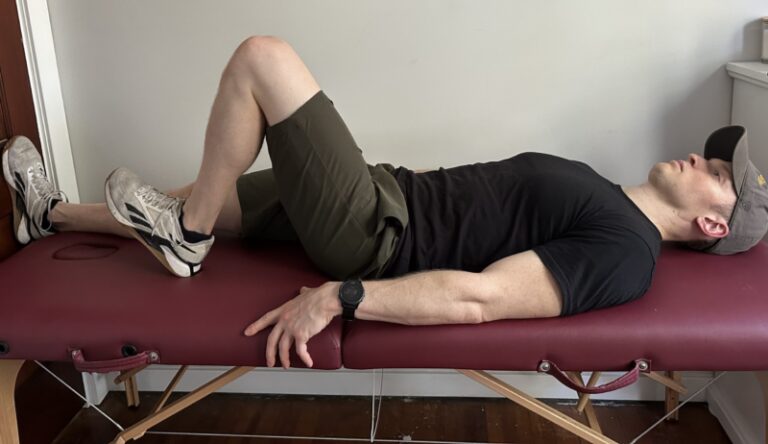
#4 Straight Leg Raise
Start by lying on your back with your opposite knee bent. Tighten your thigh muscle on the straight leg and lift it straight up until it is parallel to the opposite thigh, then slowly lower it back to the start position and repeat.
Perform 10 repetitions and then rest for 30 seconds. Perform 2 sets.
The best foam mat or massage table to lie on for this exercise can be found in the link below.
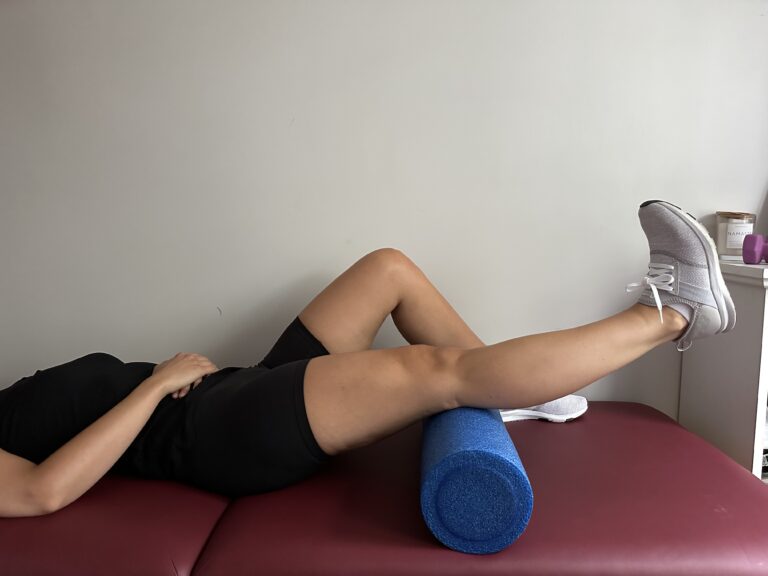
#5 Short Arc Quad
Start by lying on your back with your opposite knee bent. Place a bolster behind your involved knee. Keep the back of your knee on the bolster and kick your heel off the table until your leg is straight, slowly lower back to the start position and repeat.
Perform 15 repetitions and then rest 30 seconds. Perform 2 sets. Add a light ankle weight when this gets easy.
The best bolster and ankle weights for this exercise can be found in the links below.
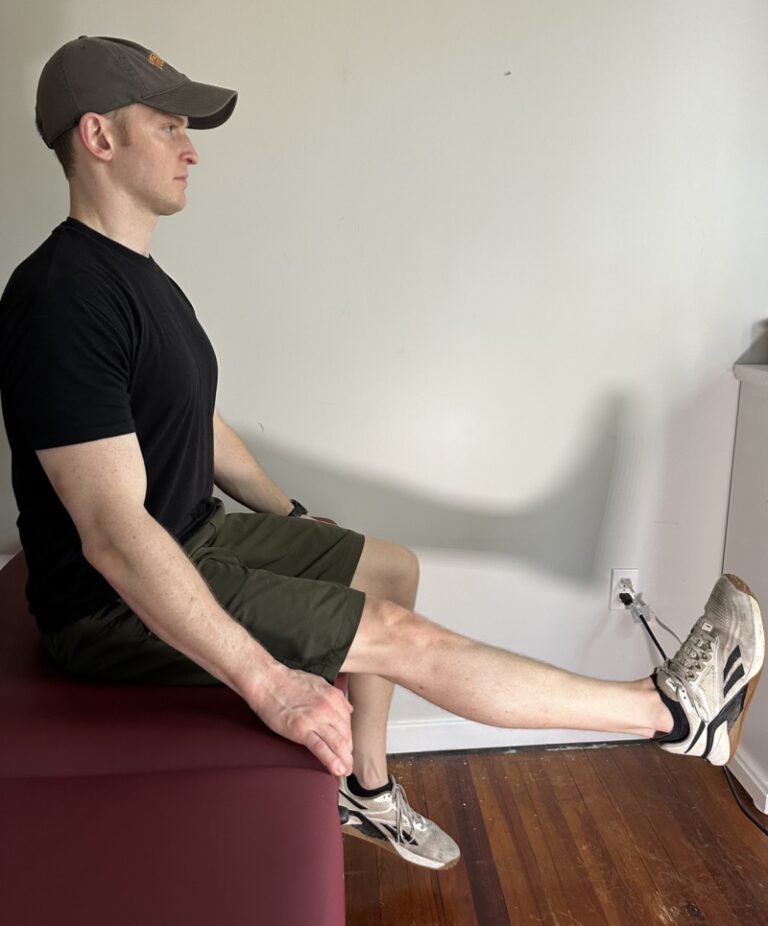
#6 Long Arc Quad
Start by sitting in a chair or on the side of your bed with your legs dangling. Slowly and controlled, kick your leg straight out and tighten the muscle on the front of your thigh. Lower back to the start position and repeat.
Perform 15 repetitions and then rest 30 seconds. Perform 2 sets. Add a light ankle weight when this gets easy.
The best ankle weights for this exercise can be found in the links below.
#7 Heel Slides (assisted)
Start by lying on your back with your opposite knee bent. Place the involved leg on a slide board and the strap around the middle of your foot. Pull on the strap to slide your heel toward your butt until your knee is bent. You should pull until you feel a tolerable stretch around your knee.
Hold this stretch for 10 seconds and perform 10 times
The strap for this exercise can be found in the link below.
#8 Heel slides (active)
Start by lying on your back with your opposite knee bent. Place the involved leg on a slide board and then bend your knee by sliding your heel toward your butt. Bend as far as you can until you feel a tolerable stretch and then slowly return to the star position and repeat.
Perform 15 repetitions and then rest for 30 seconds. Perform 2 sets.
The slide board for this exercise can be found in the link below.
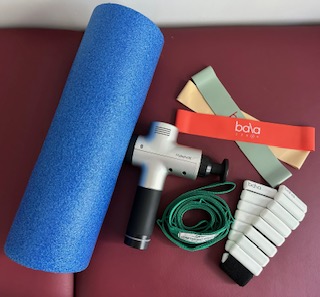
Essential Equipment
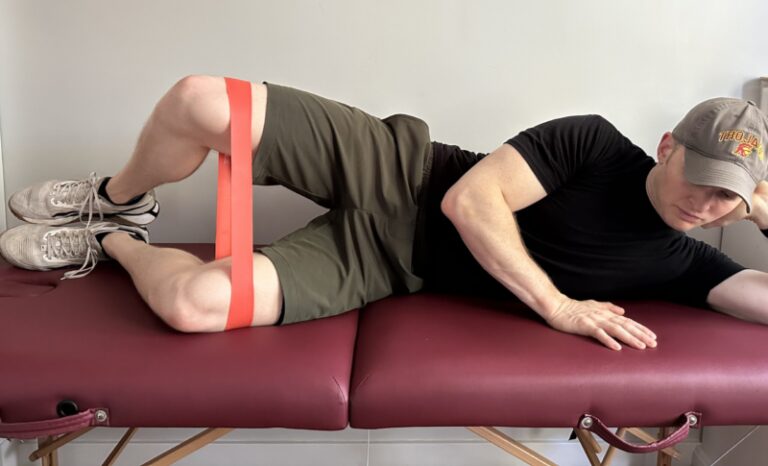
#1 Side-lying Clams
Start by lying on your side with a resistance band wrapped just above your knees. Keep your feet together and spread your knees apart, without letting your hips rolls back. Keep tension on the band for 3 seconds and then control back to the start position and repeat. Perform this exercise on both sides.
Hold for 3 seconds and perform 15 times. Increase resistance band tension when this gets easy.
The best resistance bands for this exercise can be found in the link below.
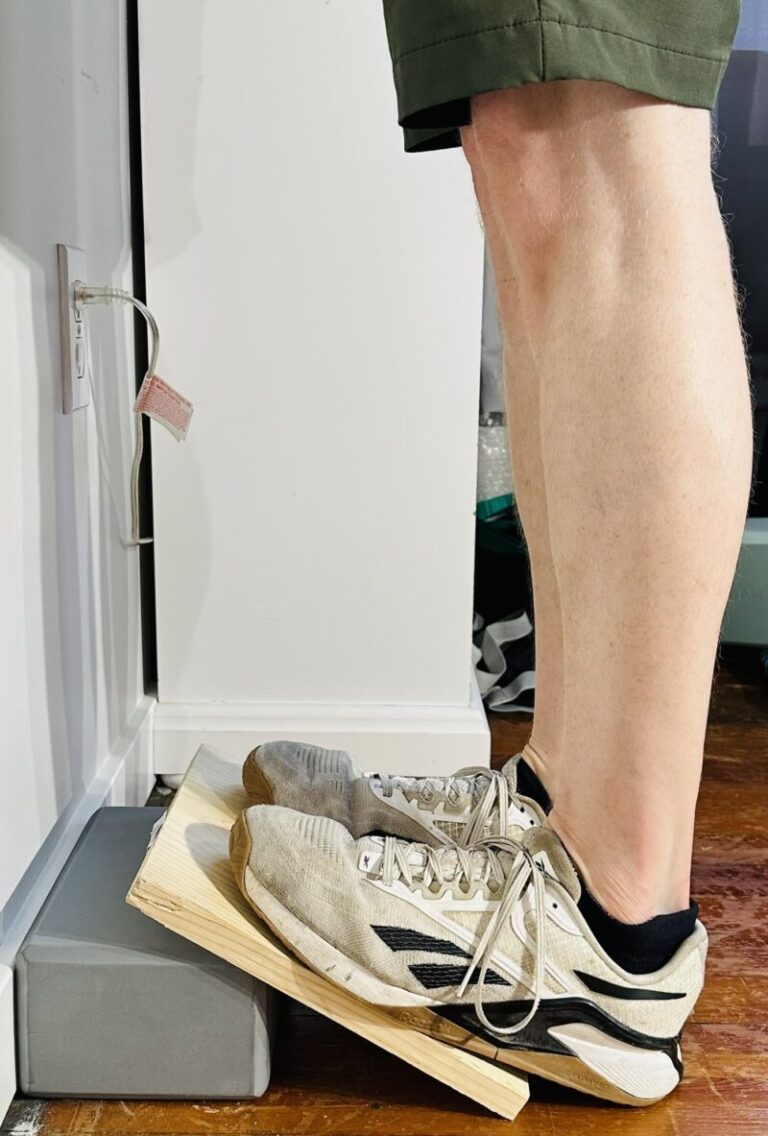
#2 Standing Calf Stretch
Start by standing with both feet on the wedge and your knees straight. Keep your whole body straight and lean forward until you feel a stretch in the back of both of your calves. Make sure you have a counter or something sturdy to hold on to and to not lose your balance.
Hold this stretch for 20 seconds and perform 5 times. You can adjust the height of the wedge to feel a stronger stretch.
The best wedge for this exercise can be found in the link below.
#3 Heel/Toe Raises
Start by standing at a counter with both feet flat on the floor. Shift forward onto the balls of your feet and raise your heels off the ground, then return to the start and shift back onto your heels and raise your toes off the ground. Alternate back and forth raising your heels and then your toes in a controlled manner.
Forward and back counts as 1 repetition. Perform 15 repetitions and do 2 sets.
No equipment is needed for this exercise!
#4 Cone Step Overs
Start by standing at a counter with both feet on one side of a cone. Step one foot directly over top of the cone to the other side and then step the other foot directly over top of the cone so both feet are now on the opposite side of the cone as when you started. Over and back counts as one repetition, think of high knees as you lift your foot off the ground.
Perform 20 repetitions.
The best targets to step over for this exercise can be found in the link below.
#5 Step Ups
Start by standing in front of a small step with a counter to hold on to by your side. Step your left foot up onto the step, followed by your right foot. Then step your left foot back down to the start position, followed by your right foot. This counts as one repetition.
Perform 10 repetitions leading with your left leg and then 10 repetitions leading with your right leg. Perform 2 sets on each side. Increase the height of the step when this gets easy.
The best stepper for this exercise can be found in the link below.
#6 Lateral Step Overs
Start by standing in front of your counter with a small stepper set up on your left side. Step up onto the step with your left leg, followed by your right leg. Then step down to the other side of the step leading with your left leg and followed by your right leg. Then return to the start position and this counts as one repetition.
Perform 10 repetitions and then rest 30 seconds. Perform 2 sets. Increase the height of the step when this gets easy.
The best stepper for this exercise can be found in the link below.
#7 Single Leg Balance
Start by standing in front of a counter with both hands on the counter and both feet on the ground. Raise one foot off the ground and then raise both hands off the counter. The goal is to balance in this position without holding on, but use your hands to make small corrections as needed. Then repeat on the other side. Perform the same exercises standing on a foam pad when this gets easy.
Hold this balance for 15 seconds and perform 4 times on each side, alternate sides after each repetition.
The best foam balance pad for this exercise can be found in the link below.
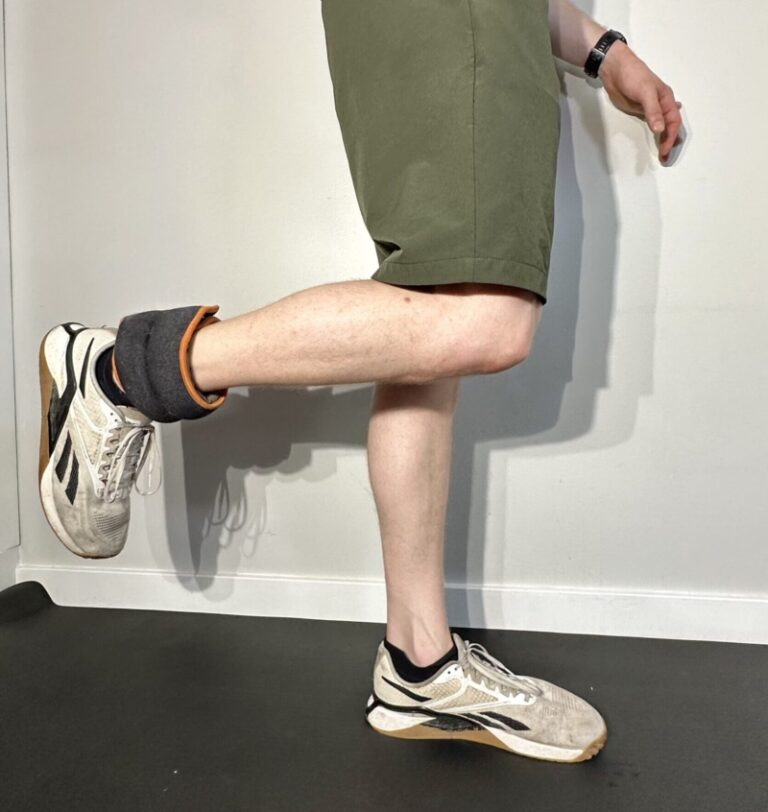
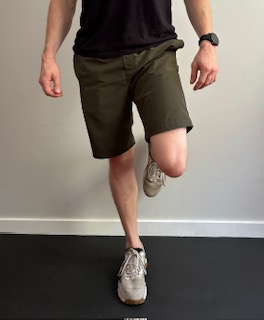
#8 Standing Hamstring Curl
Start by standing in front of your counter with a small ankle weight on each ankle. Slowly bend your knee and raise your foot off the ground until your lower leg is parallel to the ground. Try not to let your knee drift forward, and then return to the start position and repeat.
Perform 15 repetitions and then rest for 30 seconds. Perform 2 sets.
The ankle weights for this exercise can be found in the link below.
Essential Equipment
1. Stretching Wedge
2. Ankle Weights
3. Foam Balance Pad
4. Resistance Bands
5. Stepper
6. TENS unit
7. Ice pack
8. Cone target
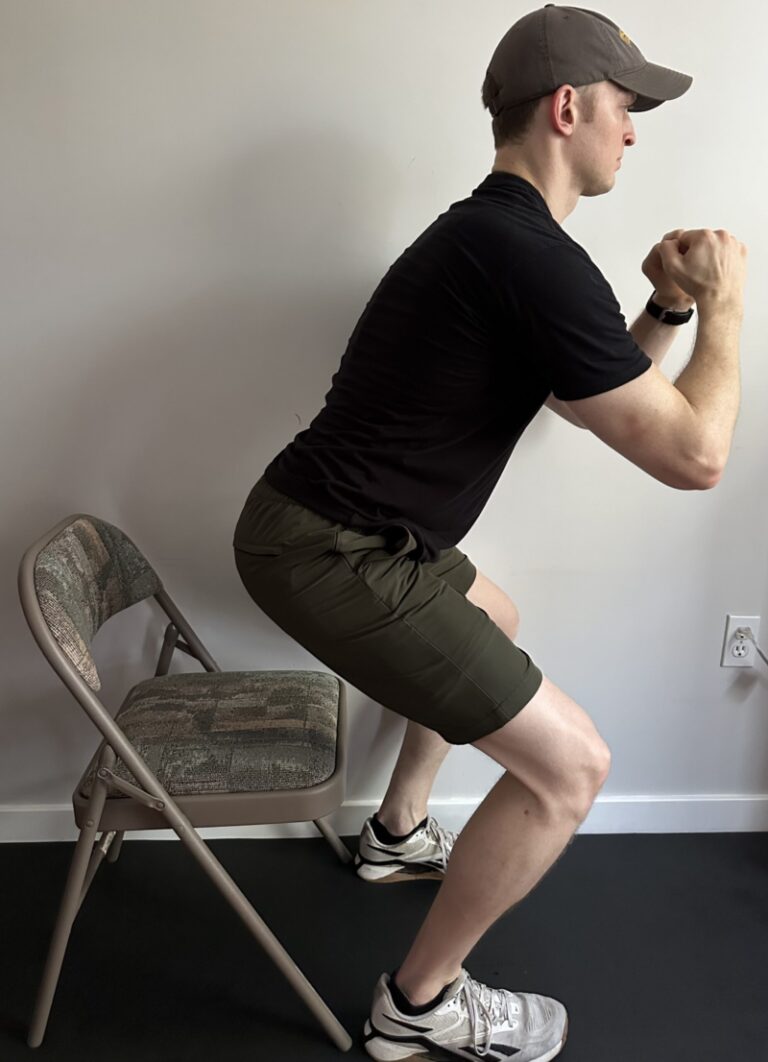
#1 Sit to Stand
Start by standing in front of a chair with your feet hip width apart. Slowly lower your butt to the chair so it just touches it but you don't sit in it, and then stand back up to the start position and repeat. Start with a high chair or with a few pillows on it to raise your target, and then remove pillows to lower the target as it gets easy.
Perform 10 repetitions and then rest for 30 seconds. Perform 2 sets.
The best foam pad to be used as a target for this exercise can be found in the link below.
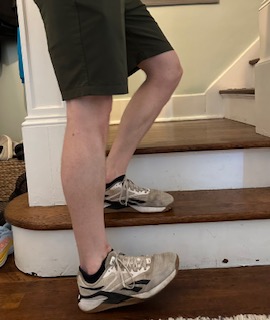
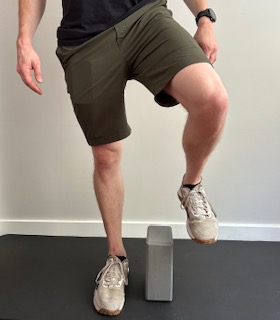
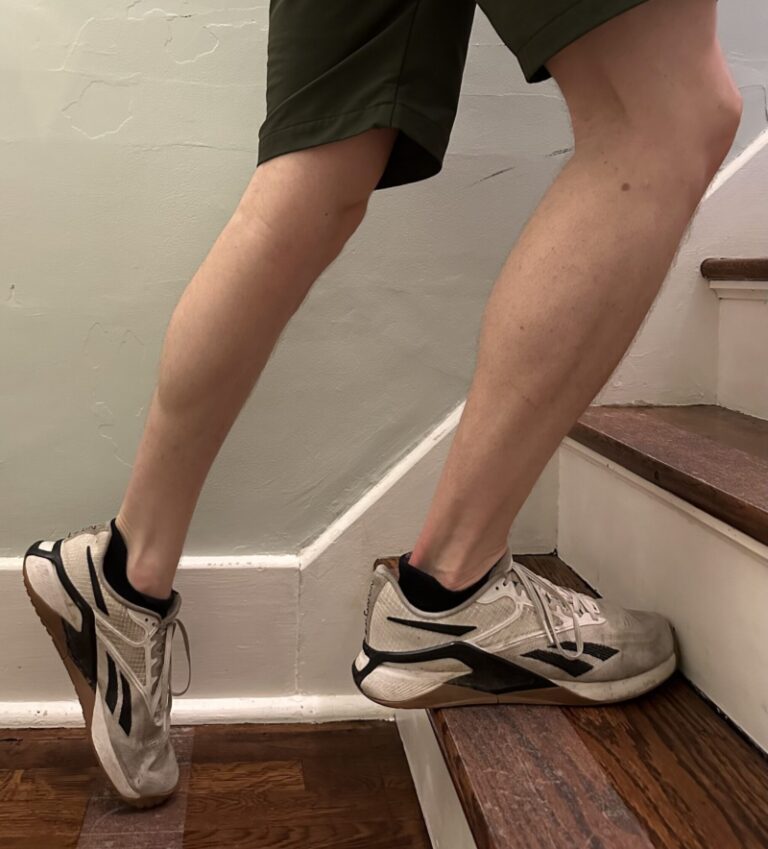
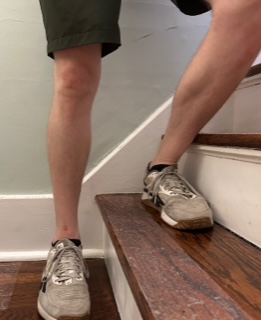
#2 Step Downs
Start by standing with your affected leg on a small step and holding on to a railing for balance. Slowly bend your knee and lower the opposite heel to the ground. I like to tell my clients, pretend there is a potato chip on the ground that you want to touch with your heel, but not crack, and then stand back to the start position and repeat.
Perform 10 repetitions and then rest 30 seconds. Perform 2 sets. Add height to the step when this gets easy.
The best stepper for this exercise can be found in the link below.
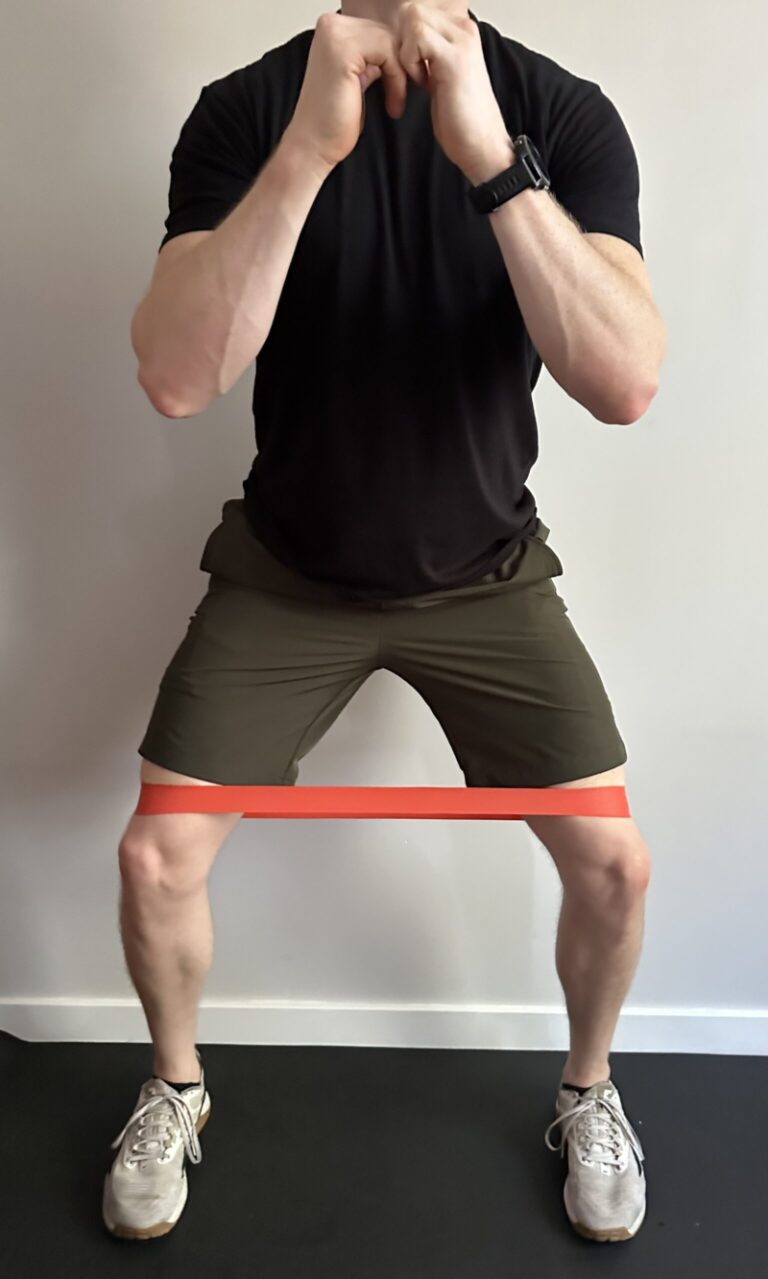
#3 Sidesteps with a band
Start by standing with a resistance band wrapped just above your knees. Keep your feet wide and your knees apart so they are aligned right over top of your ankles. Take wide, but small steps to one side so there is always tension on the band.
Perform 15 steps going one direction and then repeat in the opposite direction. Increase the resistance band when this gets easy.
The best resistance bands for this exercise can be found in the link below.
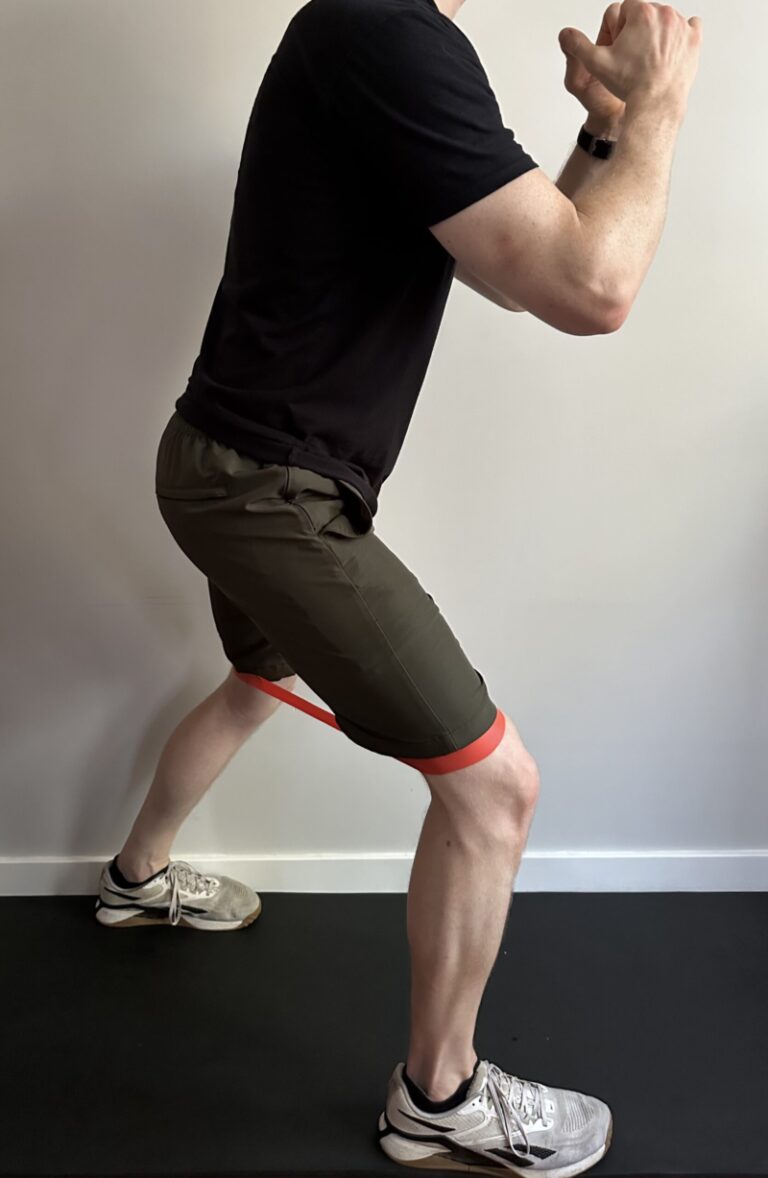
#4 Monster walks
Start by standing with a resistance band wrapped just above your knee. Keep your feet wide and your knees apart so they are aligned right over top of your ankles. Take small steps forward keeping your knees and feet wide with tension on the band. Then do the same thing in reverse.
Perform 15 steps going forward, and then 15 steps in reverse. Increase the resistance band when this gets easy.
The best resistance bands for this exercise can be found in the link below.
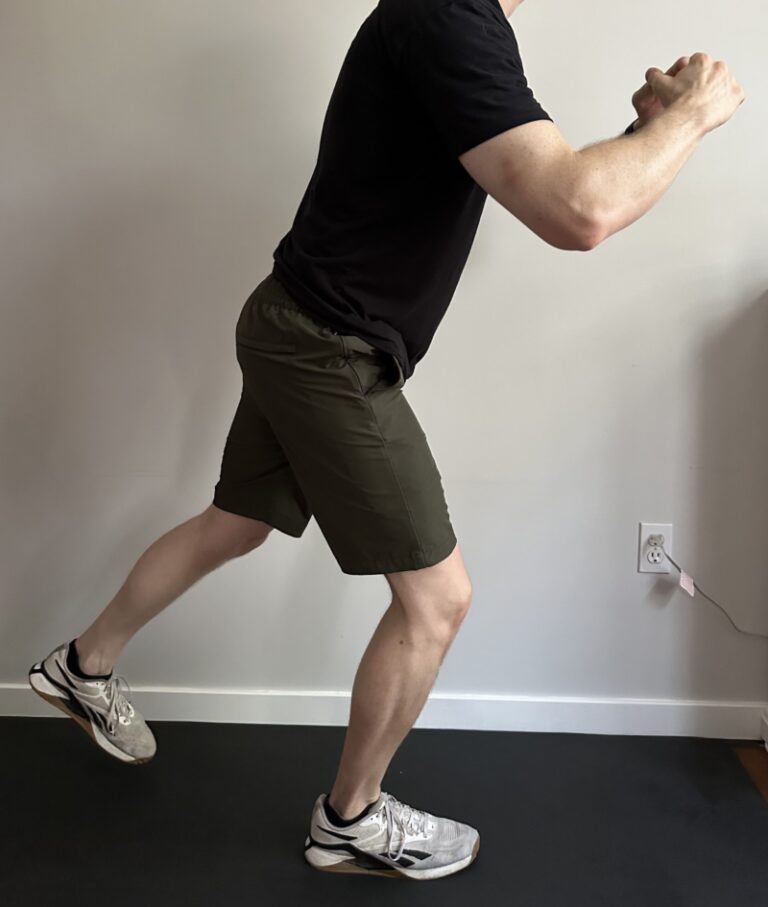
#5 Step Holds
Start by standing with both feet together. Pretend there is a large puddle in front of you and the goal is to take a big step with one of your feet to get over the puddle without getting your feet wet. Step on to that foot and land with a slight bend in your knee and balance in that position for 3 seconds. Return to the start position and repeat. Step onto a foam pad for a balance challenge when this gets easy.
Perform 10 repetitions and then rest for 30 seconds. Perform 2 sets.
The best foam balance pad for this exercise can be found in the link below.
Essential Equipment
1. Stretching Wedge
2. Ankle Weights
3. Foam Balance Pad
4. Resistance Bands
5. Stepper
6. TENS unit
7. Ice pack
8. Massage gun